Editing Forms
HRS uses the Gravity Forms plugin to provide web forms. These forms can be embedded in posts and pages. In order to edit the form fields, look up the form by title in the Forms section of the WordPress admin area. For more complicated forms or if you have questions, contact HRS ITS for more help.
Getting Started
Editing Common Field Types
Text Input Fields
There are two fields that allow users to enter arbitrary text: single line text and paragraph text.
The single line text field provides the user with a short text input field, appropriate for things like names, phone numbers, zip codes, etc.
The paragraph text field allows users to enter longer text. This is useful for things like comments or other long-form content you need to collect from the user.
On both text input fields you can specify a maximum number of characters if you want to limit the amount of content users can enter.
The number field is similar to the single lint text field, but restricts user input to numbers and allows you to specify an input mask to hint to users what number format is expected.
Selection Fields
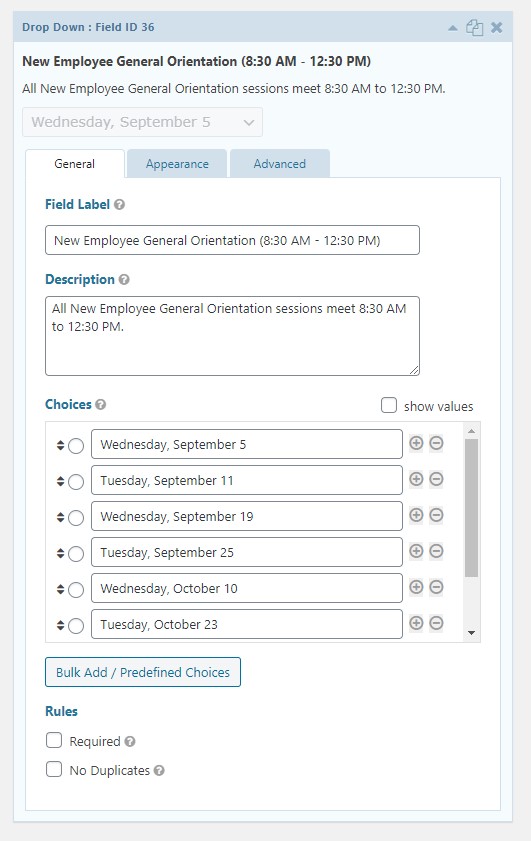
The radio buttons, drop down, checkboxes, and multi select fields all provide the user with multiple options to select from.
- The radio buttons and drop down fields allow users to select only one option.
- The checkboxes and multi select allow users to select more than one option.
In the edit window for each of these field types you’ll see the list of choices users can select from. You can modify the label text for each option, add and remove options using the plus and minus buttons, or rearrange the options by clicking-and-dragging the arrows next to the label.
You can also bulk edit the list of options by selecting the Bulk Add / Predefined Choices button and putting one option per line in the insert window.
Save or update the form when you finish editing.
Adding Text or Image Content
If you need to place additional instructions or other text or image content into a form you can use the HTML field. You will have to enter the text as HTML: wrap paragraph text in <p>the text</p> tags and headings in <h3>heading text</h3> tags. Contact HRS ITS for help.